so_out_of_ideas: If you like this icon, comment the maker! (Default)
2013-06-24 05:32 pm
Entry tags:

Tutorial: Making and Using Stripes in Paint Shop Pro

Program: Paint Shop Pro (Any version)

Difficulty: Beginner to Intermediate (Tutorial has multiple methods; some may be easier than others, but detailed explanations are provided)

Translatable: Partly (Methods 2 and 4 should work in any program that has basic selection tools and an offset filter/effect.)


here on my blog.
so_out_of_ideas: If you like this icon, comment the maker! (Default)
2013-01-24 05:09 pm
Entry tags:

Tutorial: Textures From Scratch In Paint Shop Pro (3)


Program: Paint Shop Pro 8
Difficulty: Beginner
Translatable: Partially (uses radial blur, but it's possible to skip that step or use another effect)
here on my blog
so_out_of_ideas: If you like this icon, comment the maker! (Default)
2013-01-19 02:49 pm
Entry tags:

Tutorial/Informative Post


This is an overview of the Creative Commons: What is, what it isn't, what the CC licenses cover, how to choose a CC license, and things you can do if you want to share your work but the CC licenses aren't right for you.

I thought it might be useful for resource providers.

The last part of the post, about "courtesy" is just my opinion. You can feel free to ignore it if you're only interested in learning about licensing.

Here on my blog
so_out_of_ideas: If you like this icon, comment the maker! (Default)
2013-01-10 01:17 pm
Entry tags:

Tutorial: Greeting Card In Paint Shop Pro


Program: Paint Shop Pro (I used both PSP X5 and PSP 8; it should work in other versions.)

Difficulty: Beginner to Intermediate.

This is not a hard project, but it takes some time. I tried to include detailed explanations and lots of screenshots for beginners, so it's a long tutorial. It uses only basic program functions, but there are lot of steps to complete the project. If you're only interested in making something like the front image, you can skip to Part 3.

Translatable: Should work in any program that has a guides feature and supports layers.

A little early, but I thought that it would give you plenty of time to utilize the tutorial if you'd like to.


here on my blog
so_out_of_ideas: If you like this icon, comment the maker! (Default)
2012-12-27 02:50 pm
Entry tags:

Tutorial: Textures From Scratch In Paint Shop Pro


Program: Paint Shop Pro X5, should work in earlier versions.

Difficulty: Intermediate. Assumes basic knowledge of program features and menu locations. (ie: I'm not going to explain where the materials palette is or how to switch to the gradients tab.) I will answer questions if you comment.

Translateable: Theory should work in other programs. I don't know if they'll have the exact features and materials used.

Find it here on my blog.
so_out_of_ideas: If you like this icon, comment the maker! (Default)
2007-11-20 02:22 pm
Entry tags:

(no subject)

Posting this for [livejournal.com profile] kj_svala. If anyone wants further details or anything, please comment. It uses someone else's tut as a base point, so I don't want to go through a full tutorial here.

The coloring on my DA icons:

Each one is different depending on the icon, and I don't remember all the exact settings. Basically, with any coloring technique it's not exact, you have to play with it to find what works best for the lighting and whatever on the original cap.

This is what I started with as a guide. I love this tutorial, use it on 60-75 % of my icons. The DA caps come out too red and/or over saturated, so lower the red saturation level or, if that doesn't work, try turning down the opacity on the saturation later. Then, pretty much all I did was increase the opacity on the blue overlay layer (how much depends on the icon) add a burn layer of one or more of these:

#EFECDB

#FFFFC0

or

#8B7DBB

The burn layers are basically there to bring out the existing colors and add something a little different. The opacity and number of them is different depending on the icon.

Finally, if it's a bit too dark or yellow, a screen layer on top on a medium to low opacity
so_out_of_ideas: If you like this icon, comment the maker! (Default)
2007-08-12 05:36 pm
Entry tags:

(no subject)

Two more tutorials, one by request and one just because I wanted to do it.

Requested by [livejournal.com profile] trekchic. Uses caps by [livejournal.com profile] iamleaper. This is incredibly simple, but given my last tutorial which was a pain in the neck, I'd also like to point out that you don't always have to use complicated methods to make an attractive icon, so I decided to write the tutorial.

We'll be going from:

this to

This is a PSP 8 Tutorial. Translates easily to other versions of the program; not sure about PS and GIMP since I haven't tried it. Like all my tuts, this is meant to be beginner friendly, so there are detailed explanations, even about things that you may find obvious if you've been doing this for a while. My goal is to answer questions I have been asked and to address issues I've seen around the icon sharing comms. Feel free to skip anything you don't need.

Show Me How )
I've seen a lot of tutorials around that have to do with getting rid of blue (green/red/whatever color) that overpowers a screencap. The actions in the tutorial are really nothing new, but I wanted to give a go of explaining why it works the way it does, which I really haven't seen. Most of the time you get a simple list of actions. The basic principle may work on other screen caps with blue lighting, but it doesn't help someone figure out what to do with green or red.


We'll be going from this ugly blue cap to

This is a PSP 8 Tutorial. Translates easily to other versions of the program; not sure about PS and GIMP since I haven't tried it. Like all my tuts, this is meant to be beginner friendly, so there are detailed explanations, even about things that you may find obvious if you've been doing this for a while. My goal is to answer questions I have been asked and to address issues I've seen around the icon sharing comms. Feel free to skip anything you don't need.

Show Me How )

__EDIT__sorry, fixed the link now.

__EDIT__ Also fixed the accidental reference to Obi-Wan, sorry for the confusion.
so_out_of_ideas: If you like this icon, comment the maker! (Default)
2007-08-10 09:55 pm
Entry tags:

(no subject)

Well, I haven't done a tut since Christmas, so I figured it was about time. I had some people choose this one over the other Way, way, way shorter icon I offered to do a tut on, so I hope that it's helpful and that I did't ramble too much. This tutorial is long, since it involves multiple images and I tried to give you an idea of the coloring first, then explain the cropping. That said, keep in mind, the particular coloring doesn't matter that much, as long as you remember to choose with images that pick up the same coloring well. Some screencaps or promos pick up blue nicely while others tend to give you really odd, reddish looking skin tones. Whatever coloring you choose to use for your icon, make sure that the bases you end up with compliment each other in terms of coloring.

The icon was made for [livejournal.com profile] obiwanstillness using caps by [livejournal.com profile] leia06.

We'll be going from this and this to

This is a PSP 8 Tutorial. Translates easily to other versions of the program; not sure about PS and GIMP since I haven't tried it. Like all my tuts, this is meant to be beginner friendly, so there are detailed explanations, even about things that you may find obvious if you've been doing this for a while. My goal is to answer questions I have been asked and to address issues I've seen around the icon sharing comms. Feel free to skip anything you don't need.

Show Me How )
so_out_of_ideas: If you like this icon, comment the maker! (Default)
2006-12-29 01:54 pm
Entry tags:

...every tutorial was Daniel...

This is a technique I developed while trying to brighten some horribly dark screencaps in Urgo where the subjects were practically invisible. The icon is simple, but given what the base looked like to begin with, I felt it was worth a tutorial.

We'll be going from

to

This is a PSP 8 Tutorial. Translates easily to other versions of the program; not sure about PS and GIMP since I haven't tried it. Like all my tuts, this is meant to be beginner friendly, so there are detailed explanations. Feel free to skip anything you don't need.

Show Me How )


And here's another horribly dark to bright and pretty tutorial. This time using the whole team and some warm colored gradients. I developed this technique to enhance the desert in my Dune icons, but it works brilliantly on dark caps too.

We'll be going from:

to

This is a PSP 8 Tutorial. Translates easily to other versions of the program; not sure about PS and GIMP since I haven't tried it. Like all my tuts, this is meant to be beginner friendly, so there are detailed explanations. Feel free to skip anything you don't need.

Show Me How )


Okay, I'm in a tutorial groove now so here are a couple of more quick ones. First, Janet. Using my La Fuerza De Mi Corazon texture set.


We'll be going from:

to

This is a PSP 8 Tutorial. Translates easily to other versions of the program; not sure about PS and GIMP since I haven't tried it. Like all my tuts, this is meant to be beginner friendly, so there are detailed explanations. Feel free to skip anything you don't need.

Show Me How )


And one last one with Sam, another really dark cap with a bit of a different effect added this time.

to

This is a PSP 8 Tutorial. Translates easily to other versions of the program; not sure about PS and GIMP since I haven't tried it. Like all my tuts, this is meant to be beginner friendly, so there are detailed explanations. Feel free to skip anything you don't need.

Show Me How )

And, ladies and gentlemen, thus concludes today's installment of Iconning with SG-1. :P

Seriously, please let me know if you have any trouble following these steps. I'd be happy to help if I can.
so_out_of_ideas: If you like this icon, comment the maker! (Default)
2006-12-26 11:06 am
Entry tags:

...it was still Christmas...

Well, my favorite day of the year has come to an end. I'll bet there are lots of folks with new graphics programs out there today, just itching to make icons. I'm still using my trusty old PSP 8 and quite happy with it. The reviews I've read of the latest version don't thrill me, otherwise I would have asked Santa to bring it this year. (Yes, really. Stop saying I'm too cheap to spring for it. That's where Santa comes in.)

I'm still in a Christmas mood, listening to George Strait's wonderful Christmas CD, which has brought me so much enjoyment this season. (Thanks, Nerca!) Additionally, earlier in the day, I posted a set of icons from my 
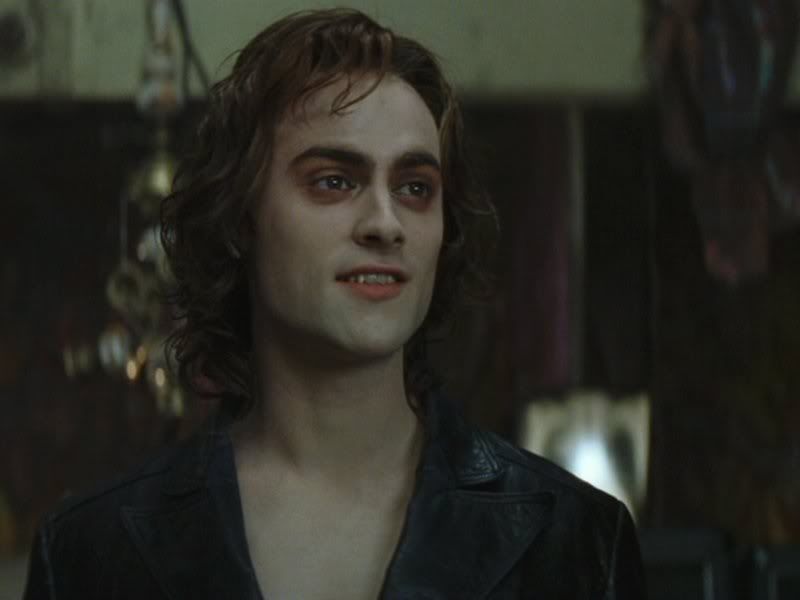
all time favorite episode of Stargate: SG-1. I had a lot of fun experimenting on those icons--primarily on Daniel, which won't surprise anyone. However, I did also do some neat things with the rest of the team. So, I wanted to do some tutorials on coloring and one on some time saving tricks I often use when making my notoriously gigantic icon batches. Most of it is stuff I stumbled on quite accidentally, but I thought it might help new (or maybe not so new?) graphic makers save themselves some time and effort.

First a very simple scripting tutorial with General Hammond. Images in the same scene often have very similar lighting, so I find myself repeating the same basic steps to make all my bases from that scene. Or, if there's a particular type of coloring I want to achieve, I will again be repeating the same steps to do so. That's not so bad if I'm making a small set of icons, but it does get tedious after a while. PSP has a feature called scripting, which allows you to record your actions and tell the program to repeat them for you on the next image. It's similar to creating a macro in Word or something. The PS equivalent to this is "saved actions". I can't really provide much help with recording saved actions, since I have never really used PS and don't know the interface, but the principle is the same, I believe.

"But!" you protest. "If I do that, then I can only use that script for that scene, right?"

Well, sometimes. Not every script works for every icon, but the good news is that since your layers stay intact once you've run a script, you can "tweak" it. Add or take out layers as you choose. Or, if it just doesn't work altogether, you've only lost a few moments, because a script runs in a click of your mouse. If you still don't like the idea, you're welcome to just skip the scripting part of the tutorial and make yourself a nice simple icon.

We'll be going from this to , and I will show you how to duplicate the process automatically for other icons.

This is a PSP 8 Tutorial. The coloring should translate easily to PS and GIMP. The scripting translates to other versions of PSP. The tutorial is meant for beginners and has detailed explanations and screen caps of my PSP workspace. Feel free to skip anything you don't need.

Show Me How )
so_out_of_ideas: If you like this icon, comment the maker! (Default)
2006-07-12 10:04 pm
Entry tags:

(no subject)

I'm on this kick at the moment for very simple textless icons. I have a couple methods I've been using, but this is one of my favorites, so I thought I'd share. It combines some techniques I learmed from [livejournal.com profile] severa and [livejournal.com profile] aiken_4graphics with some other stuff I've just sort of worked out myself.


We'll be going from this to

This is a PSP 8 Tutorial. Should translate into other versions of the program; I'm not really sure about other software, sorry.

Show Me How )


And one more because I've been bored tonight. This is rather a long one. One of these days, I promise to do an icon that doesn't use the Gaussian blur trick. But it won't be today. Mwhahaha. I really love the following icon, and the funny thing was (I'm willing to admit) I didn't set out for this look at all. Given that it happens to also be one of my top 5 all time favorite images, I can't help but make a tutorial. The tut will be in three parts. First will be the making of the texture base; second will be the coloring on the image itself, and third will be the layering that combines them for the neat color effect on the icon. There may be an easier way to do this icon, but this is how I did it. Suggestions are, of course, welcome.

The image prep is actually quite similar to the last GIMP tutorial I did, which was an icon from the same post as this one.

We'll be going from this to

This is a PSP 8 Tutorial but should be fairly translatable.

Show Me How )
so_out_of_ideas: If you like this icon, comment the maker! (Default)
2006-07-12 10:08 am
Entry tags:

(no subject)

Omg! I've gotten my first official tutorial request. I mean, I've gotten like questions before but never an actual "write me a tutorial" on a specific icon! I don't know why I find this so exciting. So, tried to recreate one of my recent DV icons in GIMP. For [livejournal.com profile] cha_aka and whoever else. Inspired by [livejournal.com profile] aruna7's Duncan/Tessa vid. Go figure; I turn it into Daniel/Vala. Anyway, the coloring in the recreation isn't exact, but it's about as close as I can get. Hope it's still useful.

We'll be going from this to

*Image and resource credits can be found in my resource post.

Show Me How )
so_out_of_ideas: If you like this icon, comment the maker! (Default)
2006-06-14 09:49 pm

(no subject)

Then, because I'm all textured out for the moment, something TOTALLY different. This was done in PSP 8, but should translate without any major problems into GIMP and PS.

We'll be going from this to

*Image credits can be found in my resource post.

Show Me How )


And because that was so short, and I'm really fond of this texture set by [livejournal.com profile] mythographica, I have one more. This is a PSP 8 tutorial that kind of combines things I did in the previous two I've posted. Again, it should translate easily into GIMP and PS And it uses my favorite subject. *grin*

We'll be going from this to

*Image and texture credits can be found in my resource post.

Show Me How )


And 30 example icons here )
so_out_of_ideas: If you like this icon, comment the maker! (Default)
2006-06-14 05:39 pm
Entry tags:

(no subject)

Since my last GIMP tutorial was such a resounding success, I felt inspired to do a second.

I was actually trying to do something similar to my Padme icon in GIMP. Didn't quite get it right, but I like what I got.

We'll be going from this to

*Image and texture credits can be found in my resource post.

Show Me How )
so_out_of_ideas: If you like this icon, comment the maker! (Default)
2006-06-13 10:31 pm
Entry tags:

(no subject)

Guess what guys…in view of some questions I got about translating my last tut in GIMP and a few differences I have noticed between that interface and PSP while I was fooling around with it last week, I decided to make a GIMP specific tutorial. Yay, me.

We'll be going from this to

*Image and texture credits can be found in my resource post.

Show Me How )
so_out_of_ideas: If you like this icon, comment the maker! (Default)
2006-06-03 12:40 am
Entry tags:

...I had Stargate's Angel all to myself...

I got some questions this week on textures. Either about how to make icon subjects stay clear when using a texture over the image or on specific icons I'd done where most of my coloring and lighting had been achieved through textures. So, I decided to put some tutorials together. As I was doing the first one, I realized that, to my knowledge, GIMP does not have the equivalent of PSP's wonderful "fade correction" or "clarify" features. Now, it very well may have them, but my own knowledge of the program is extremely limited. I've spoken with some GIMP users and no one seemed to think it did. So, I tried to make a second icon that I know will work in all programs.

Note: These are rather image heavy...sorry dialup folks.

We'll be going from this to

*Image and texture credits can be found in my resource post.

Show Me How )


And from this to

*Image and texture credits can be found in my resource post.

Show Me How )
so_out_of_ideas: If you like this icon, comment the maker! (Default)
2006-05-17 11:10 pm
Entry tags:

...I understood my muses...

I've been doing some icons of Anne Rice's Lestat for [livejournal.com profile] completedirony I've really enjoyed them so far, as these icons have represented a complete departure from my usual style in terms of coloring and shadow. I was rather pleased with the results of this one and thought I'd share. This tutorial was written for PSP 8. Tried to make it beginner friendly, but if you have questions, please ask. It should translate well enough into other versions of PSP, I really don't know about other programs. I may try it in GIMP myself later…anyone who wants to see about PS, I'd love to know how it works.

Go from this to

*Original image from [livejournal.com profile] screencaphaven. Twas a LOT bigger. lol.
**Texture credits can be found in my resource post.

Show me how. )
so_out_of_ideas: If you like this icon, comment the maker! (Default)
2006-05-11 10:41 pm
Entry tags:

...I rambled less...

More than one person this week has asked me for ideas about what to do to "jazz up" an icon if it just looks "plain". There are of course, always brushes and textures to add effects, but what if you still don't like it, or you really want something that's just different from your usual? [livejournal.com profile] pokecharm and I were talking a while back about how cropping can really change an icon and the fact that there really aren't a lot of tutorials or anything that are specifically on cropping, so I decided I'd throw a few examples together of different cropping techniques. These run from really basic, simple cropping concepts to help new icon makers to some more complicated stuff for those who're bored with the basics.
I'm not some big expert or anything; mostly this is just a ramble about some tricks I've either picked up from others or stumbled across completely by accident. This is long, but I have pretty bold headings and then examples for each thing I'm talking about, so you can just sort of scroll down through until you see an icon you like. ;) I won't go into step by step details of how I did any of these icons, but anyone who likes one and wants a tutorial, please comment and I'll see what I can do.

Note: I use PSP, but the ideas should be translatable into other programs.

Read Dar's Cropping Ramble )

And...since the variation monster of course couldn't stay under the bed while I made the example icons, I have some...erm extras. Plus Daniel..because he's Daniel.

Extra pretty pretties! )
so_out_of_ideas: If you like this icon, comment the maker! (Default)
2006-05-08 04:16 pm
Entry tags:

...he wore the flag more often...

Ok. It was recently pointed out to me that this little corner of LJ-land was started to not only to show off my fan works and assorted hoo-hah but to talk about what I actually didin creating various icons. The idea here was both to help me remember what I’d done to achieve a particular effect and to share whatever small amount of digital art knowledge I might have. (My inspiration for this is really Dee Dreslough --*points to link bar*--who is really one of the coolest artists/authors I’ve ever had the pleasure of interacting with on the net.)

But, since I’ve started posting fics here in the past few months, and since most of the icons I’ve made recently have been in response to various challenges/requests and things like that, I haven’t done a good job of commenting on how I made them.

To that end, I’ve decided to try my hand at tutorial writing. This was written for PSP 8, but hopefully should translate well into other programs.

We’ll be going from this:


to

or


Show Me How )